
Day 2 of my 12 Days of Christmas makes. See THIS POST for Day 1.
And the stockings were hung by the Chimney with care….
Oh what a day! I knew I had a full work day at home and boy was it full! I worked straight through about 12 hours with very little breaks. But, let me tell you some of the back story on this project and my color selection.
Back in the fall of 2018, I was cleaning out my craft/yarn storage closet and it was such a huge mess! I had been super lucky as a thrifter in 2017 and 2018 to get humongous bags of new skeins of yarn, leftover skeins and yarn balls in huge, huge lots – giant queen and king size comforter bags. I think I got about 10 bags like this over a 2 year period. I am not sure where it was all coming from, but it was in beautiful condition! Even the vintage yarn skeins were in terrific shape. So, I found myself overrun with yarn by the end of 2018 and it was then and there – standing amidst the chaos of my closet that would hold no more yarn – that I decided 2019 was going to be a huge STASH BUSTING year! And I have been hugely successful at this. My stash is dwindling! You can probably search my blog for “stash busting” and have several things pop up from this year. I have shopped very little for yarn except for orders and picking up some clearance yarn that was too good of a deal to pass up. Anyway, combine the fact that I was not only trying to stash bust this year, but also that I decided to start my Christmas makes in January!
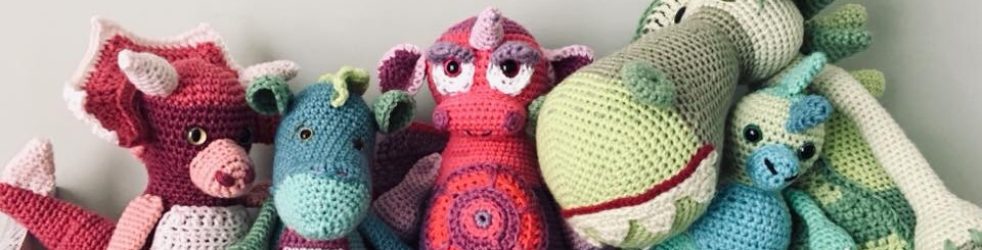
If you are like me, you get so busy during the holidays that before you know it Christmas is over and you didn’t even get a chance to make any of the stuff you wanted to make! That is another thing that happened in 2018 – I purchased a Christmas bundle pattern from The Friendly Red Fox (one of my favorite makers as a fellow toy maker) and didn’t get time to make them. I purchased the patterns in the summer of 2018 and then come August my Etsy and Local orders got so busy (yes, that is good and I was super grateful), but I didn’t get a chance to do these super cute Elves, Moose and Reindeer. Here is a link to these amazing patterns. I just switched up the boy elf to make a girl.
These were first on my list in January and I was able to dedicate a few hours each week to making Christmas and finished these guys around July.

So, back to my stash and that I was going to get busy in January making Christmas. I decided to try to set aside a few hours each week to making Christmas and just putting it up to store until the right time to get it out (I have a local artisan space in a store where it will all go) – anyway, I went through my stash and decided on these colors for all my Christmas makes for 2019:

I love all these colors – I picked blues, teals, greens, reds and pinks with some purples and then a lot of cream, off-white and tan. These yarns are my color pallet for this season and I have plenty more makes to go, but you can see how I used these colors in my elves, moose and reindeer above. So, that is the long reason for the colors that I chose for my two stockings today. And – each stocking sucked up about 5 scrap skeins/balls of my yarn stash! Win! This is a fabulous scrap yarn project. I’m thinking of making one with a bunch of little scrap balls.


This post does contain affiliate links. I will get a small percentage from any purchase made through my page here, but your price remains the same. I appreciate any purchase made through my page as I can continue to offer free patterns here on my blog.
I want to say thank you for all who stop by to support my patterns and my blog. I have chosen to NOT do ads on my blog and offer FREE patterns, but please – if you love my patterns and want to say a little thank you- or just have some good small business karma support points- a purchase now and then or a visit to any of my affiliate links really helps. It keeps this blog going so I can continue to offer free patterns for all to enjoy. I also purchase a pattern now and then or visit an affiliate link from my favorite blogs and designers. Thank you
UPDATE: Get the ridiculously low priced 12 Days of Christmas Pattern in a Downloadable PDF right here. You can ALL 12 Days of Christmas for one super low price. Merry Christmas! (Etsy only right now – I will try to get this over on Ravelry soon)

Okay, so let’s get started – this is a FULL PICTURE TUTORIAL AND GREAT FOR A BEGINNER. Just in case you missed it or did not read it from Day 1 – after I am done with my 12 Days of Christmas Crochet I am going to be doing a downloadable PDF for easy access with all my tutorials. So, come back and watch for that and check back with me each day for more Christmas fun – they won’t all be this long either.
These patterns are intended for personal use only. This pattern -and all my patterns- are offered for free or a small fee to help support my family so please do not redistribute, sell, copy or use them in any way not in accordance with fairness.
You may sell products made from this pattern, but please give me credit as the designer. Please do not use my photos as your own work, but you may use my photos to reference back to my blog, Etsy, Pinterest, IG or FB, but please link back to me.
If you find any problems with this pattern please let me know and if you have any problems with any of it feel free to message me and ask for support.
Kristi Bergin-Smith and The Burgundy Basket, 2019. Unauthorized use and/or duplication of this material without express and written permission from this site’s author and/or owner is strictly prohibited. Excerpts and links may be used, provided that full and clear credit is given to me, Kristi Bergin-Smith and The Burgundy Basket with appropriate and specific direction to the original content.
Stocking 1: Beginner Friendly Crochet with full photo tutorial and easy stitches used. You will use single crochet (sc), half double crochet (hdc), double crochet (dc) and at the end you will be doing some front post and back post double crochet. If you are unfamiliar with this please search online for a good video tutorial.
This is a nice size, big stocking. My two examples are approximately 10” wide by 25” long. I have held two strands of yarn together for the entire stocking and used my K/6.5 mm hook. The work starts on the bottom/toe and works its way up the stocking. I have used different colors for the toe, heel and top, but you can also just work this piece without making those changes and you can also decide to make it more colorful by doing some stripe work. And wouldn’t a monogram or initial be cute? I have a whole set of Crochet Alphabet letters that you can do to add a personal touch to the stockings. To see more info about my FREE A-Z crochet letters VISIT THIS POST
I have used scrap yarns – about 10 leftover skeins/balls (5 per each stocking) – I have used mostly Red Heart Super Saver type yarns. Some of my yarn was newer (Red Heart with Love in Dusty Grape) but some was older and vintage-like with no labels or old labels but all were 4-ply worsted weight yarns. If you are buying yarn for these stockings you will need probably most of a small skein for the main body and just some scraps for the toe and heel. You can do the top in the main body color or switch like I did.
I work in mostly all spiral crochet most of the time and rarely ever join and chain up. This keeps my work from having joining seems and also “flows” for me where I can get into a nice rhythm. You can choose to count each round and join and chain if you prefer, but some parts of my pattern are not written that way. You will see what I mean – this stocking is a “flow” piece. I worked the main body straight up until I ran out of yarn. I didn’t count rows or have a “stop” for that main upper part, but rather worked until I was mostly out of yarn and changed color on the back of my stocking. I have more about this in my pattern, but if you are a stickler for absolute row counts and equal stitches you may want to use a stitch marker and start counting in rows after you work the heel and start on the upper piece.
Grab your 2-strands of yarn and your hook. (You can do this pattern in a bulky weight #5 yarn single strand or even something else – just remember, if you use different materials/weights your results may be different.)
These are the 4 colors that I pulled for this example:

Chain 2:

In your 1st chain (the second from your hook) make 8 hdc.

Count back 8 if you need and find your first stitch to start the next round. **you will work over the tails from the beginning to tighten the middle of your work. Crochet over the tails all the way around this round and then pull them tight (see photos)
In this first stitch only make 1sc and then 1 hdc (this first sc is just to keep there from being such a big “jog” up in height. Working in the spiral it won’t matter in the end and is the method I use) Now, make 2hdc in all the rest of the stitches around for a total of 16 stitches.


Continue to work in the spiral. If you fear losing count, you’ll want to move your stitch marker to the last stitch of each round so you know when you get to the end.
Round 3: Photo above. (Make 1 hdc in next stitch, make 2 hdc in the next stitch) repeat around (24)
Round 4: (Make 1 hdc in next 2 stitches, make 2 hdc in the next stitch) repeat around (32)


Round 5: (Make 1 hdc in next 3 stitches, make 2 hdc in the next stitch) repeat around (40)
Round 6: (Make 1 hdc in next 4 stitches, make 2 hdc in the next stitch) repeat around (48) -after doing the last hdc make about 3-4 sc for the same reason we did at the beginning. It helps eliminate your “jog” down and then join your main color on this last stitch. Make the first part of the stitch in the toe color and then pull through the last part of the stitch with your new color. Tie ends in back of work to secure and then continue to crochet over the tails.
Round 7: Single crochet in Back Loop Only (see photo below) (48)
Rounds 8-~20: Hdc around. See photos below. (That is about 13 rows or 624 stitches if you are working in the spiral.) TIP: what I do is open the calculator on my phone and enter 624 and then start subtracting as I go. I usually count up about 40-70 stitches and then subtract from my total. That keeps me on tract without worrying about moving stitch counters or what round I am on. I just “flow” and subtract until I am done.


After all of those stitches are finished make 3-4 single crochet in the next 3-4 hdc stitches and DROP but DO NOT CUT your main color. You will come back and pick it up after you do the heel.
You are now going to work in rows for a bit.


So, now, attach your toe/heel color when you make your last stitch from the toe – pull the new color through to finish the last stitch and then slip stitch in the next stitch. Work 21 sc across the round and slip stitch in the next stitch.
Do NOT chain, but turn your work and skip the slip stitch and single crochet together (sctog) over the next two stitches and then work all the way across (17) until you get to the last two sc and then sctog those two last stitches. *the below photo shows the slip stitch that you skip over and sctog the next two – my hook is under the slip stitch. Miss that when you start the sctog. (19 sc)


If you are unsure how to single crochet 2 stitches together you will find plenty of videos online but basically you insert hook into the space, pull up a loop, insert hook into the next space, pull up a loop (3 loops on the hook – above photo) and pull through all 3 loops.
Chain 1 and turn. (photo above), [sctog, sc across the heel until you reach the last two stitches, sctog] repeat what is in brackets until you are left with only 8 sc.
The last two rows of the heel before you break off your yarn are increase rows.
Chain 1 and turn. Make 2 sc in the first stitch, sc in the next 6 crochet and then make 2 sc in the last stitch (10)
Chain 1 and turn. Make 2 sc in the first stitch, sc in the next 8 crochet and then make 2 sc in the last stitch (12)
Cut your tails and move over to the other side of the heel.
Now, this is what your work should resemble.

Attach your heel color/colors to the bottom of the heel right next to where you dropped your main color yarn from earlier.
You are going to sc evenly around the entire heel piece. After I was finished with this I had made 32 sc around the heel section. If you don’t have these exact numbers that is fine – you can adjust them later. (above photo is what you should have now) – finish off that yarn. I just crochet over all my tails so there is no need to weave them in on this piece.
Go back and pick up the MAIN color yarn that you dropped from earlier (bottom photo)


The next step is to crochet around the entire piece in your main color. You can choose either sc or hdc – this is largely up to you. I think I did sc one round on my blue stocking and then hdc for the rest and 2 rounds of sc and then hdc on my pink stocking.
BUT when you get to the upper corner on the HEEL piece (see below photo – the next 3 stitches after my hook) you will be either sc3tog (single crochet 3 together) or hdc3tog (half double crochet 3 together) on the upper 3 stitches on BOTH sides of the heel. This will “gather” them in a little for shaping.
You will single crochet around the entire piece with a 3sctog on both sides of the heel. See below photos for my sc3tog and the 3 stitches on the left side of the heel. (I had 53 stitches after this)


After you complete the entire round in either sc or hdc this is what it should look like:


For this next round, you are either going to sc or hdc around again, but this time you will be making a sc3tog in the spaces where the heel meets the toe. You can see in the photos above where I am making my next sc3tog. In the photo above, my single spaces to the left of my hook are the 3 that are going to get sc3tog – the first photo above is one side and the last photo above is the other side. This helps again with shaping. See photo above -> you can see my 3sctog and how it makes a nice curve.
Since I was still working in a continuous spiral, my first decrease leg of this stitch on this round was actually the last stitch from the round before. It will really help your shaping if you can get exactly the 3 stitches in the center of where the heel and toe meet to be the ones that you decrease.
So, work in either sc or hdc around, but make those other two sc3tog in the area where the toe and heel meet. After this round I had 49 stitches. You need to count your stitches after this round so you can get “kind of” with my stitch count now.
So, if you are not at 49 stitches now, this next round is where you will adjust for that. You want to have 48 stitches around when you finish this round. For my examples, I did one decrease on the back of the heel, but if you need to decrease more than that just do it evenly around the piece so you don’t get any puckering. The reason for the 48 stitches is the top rows/border – the top pattern needs a multiple of 4 – so, if you are not doing the post stitches to end the 48 isn’t really important.
You are doing great!


Okay, now this is the part of the pattern that I mentioned above where I just go…just crochet around and around and around – you can free flow this. There really is not any reason to worry about what round you are one or what number you are on or anything! Just put on a good show, audiobook or whatever and go (I was listening all day to The Things We Cannot Say – amazing! so beautifully written) …crochet, crochet, crochet. Keep on going around and around and around until the leg part of your stocking is the length that you want it to be. The length of my examples from the heel section was about 12 inches. But, if you are going to be changing colors like I did for a top section don’t forget to think about that extra length. Whether you are making a top section or just going to finish off you want to be at the back side of the stocking – up from the heel – and if you are going to make a hanger chain some to make a hanger on the back side. I crocheted around until I almost ran out of yarn and made sure to be in the back of my work before I joined my other two colors back ***remember what I usually do when working in hdc – make about 3-4 sc before you change colors or finish off to blend in that jog.
If you are adding a top border/section in your other color change color and continue.

For the top section of my examples, I chained up 2 (not a stitch) and then did one double crochet border around.

Join and chain up 2 (not a stitch) and on this round I alternated 4 front post double crochet and then 4 back post double crochet around (this is the reason you needed to have 48 stitches from above)

Repeat the round above for as many rounds as you want. One the blue stocking I did two, but on the pink stocking I ran out of yarn and ended after just one alternating front post/back post rounds.
The photo below shows the front post double crochet and the one under that shows the back post double crochet.
If you find this difficult, just do a few rows of double crochet – your stocking will still be fabulous!
And don’t forget to chain a length of chain at the back to hang if you are doing that. My chain was about 15.


The last step is steam blocking. It also really helps the heel to soften and shape it. You can see the before and after of my steam blocking. Left is before and the right photo is after I steamed it. I used my regular steam iron and my ironing board for these. I steamed and shaped and it is so nice now! Before it felt a little stiff, but now it is soft and fluffy. While steaming, I pulled on it a bit to lengthen and make it more “sock” like. You can see more on steam blocking from Day 1 at the bottom of the post.
And that is it! I would love to see all of your fabulous stockings so don’t forget to tag me over on IG @theburgundybasket or find me on Facebook <3
Look how pretty this yarn turned out together:


Update: November 19: I really wanted a red stocking so I ended up making a third one:


I hope you enjoyed this tutorial. I tried very hard to make a very easy beginner friendly pattern that looked like it took months to make <3


Discover more from The Burgundy Basket
Subscribe to get the latest posts sent to your email.