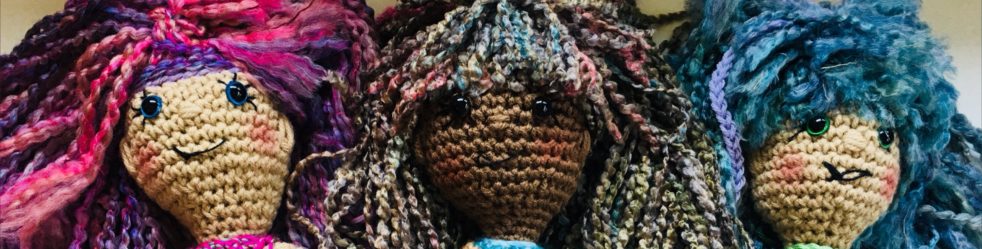

Isn’t she the sweetest?
After I was done with my Peony the Pony, I realized that one or two adaptations and she would make a sweet little unicorn. Also, when I was making Peony I could not decide on her “mane” – I wanted both straight and braided, but also curly – so, making the unicorn was the perfect way to get both! She is adorable and cuddly at only 16″ for me. She is made from almost the same pattern that I wrote for Peony.
UPDATE: JULY 2020, I HAVE UPDATED THIS PATTERN AND THE PONY PATTERN TO BE FULLY WRITTEN OUT VERSIONS INSTEAD OF THE CHART VERSIONS. THEY ARE NOW BEGINNER FRIENDLY.
FOR THE FULLY WRITTEN OUT PATTERN FOR UNITY THE UNICORN, Please click over TO THIS LINK for U is for Unicorn in my A-Z Crochet Toys with Me blog series.
My Paid for patterns contain a FREE Cheat Sheet that help you with the increases and decreases for the numbers in my chart.
I want to say thank you for all who stop by to support my patterns and my blog. I have chosen to NOT do annoying ads on my blog and truly offer FREE patterns, but please – if you love my patterns and want to say a little thank you- or just have some good small business karma support points- a purchase now and then or a visit to any of my affiliate links really helps. It keeps this blog going so I can continue to offer free patterns for all to enjoy. I also purchase a pattern now and then or visit an affiliate link from my favorite blogs and designers. Thank you for all your support.
This post does contain affiliate links. As an Amazon Affiliate, I will get a small percentage from any purchase made through my page here, but your price remains the same. I appreciate any purchase made through my page as I can continue to offer free patterns here on my blog. These are a few of my favorite things.
If you’d like to get the downloadable PDF hop right over to my Etsy where you can download the PDF for both Unity and Peony for a super low price. Here is the link for Peony and here is Unity – and I have a BUNDLE price for both that saves just a little money – they would both be super cute for a new baby nursery!
Peony the Pony also counts in my Farm Animal Series for my contest that I am running. So, check out that post HERE and check out links to other of my Farm Animals HERE on my latest post for Haybelly. ALL of my Farm Series is available here on my blog for free or in my Etsy for a small fee. You can also get the link to the entire BUNDLE HERE
If you like her, don’t forget to check out the guy that started my whole Farm Series, Haybelly the Horse, Peony’s father.

This pattern is intended for personal use only. This pattern -and all my patterns- are offered for free or a small fee to help support my family so please do not redistribute, sell, copy or use them in any way not in accordance with fairness.
You may sell products made from this pattern, but please give me credit as the designer. Please do not use my photos as your own work, but you may use my photos to reference back to my blog, Etsy, Pinterest, IG or FB, but please link back to me.
If you find any problems with this pattern please let me know and if you have any problems with any of it feel free to message me and ask for support.
Kristi Bergin-Smith and The Burgundy Basket, 2019. Unauthorized use and/or duplication of this material without express and written permission from this site’s author and/or owner is strictly prohibited. Excerpts and links may be used, provided that full and clear credit is given to me, Kristi Bergin-Smith and The Burgundy Basket with appropriate and specific direction to the original content.
Materials:
This pattern uses Caron One Pound yarns in gray, white, lilac and Caron Jumbo in Easter Basket along with scraps of other yarns in pink and purple. This is a great scrap yarn project as you don’t really need much of any one yarn. The most yarn you need is about 1/3 of the Caron Jumbo to make as many curls as my example has. Her mane is Caron Jumbo in the color Easter Basket.


-Hook : I used a G and H hook for this pattern.
These are exactly the hooks I use and worth the money. Buy yourself a gift you will love.

-Safety Eyes or buttons (or yarn to embroider if you choose) and needle to embroider face. These are the eyes that I have used for both Peony and Unity. I love Suncatcher eyes. They are worth the extra!
-Stuffing. I have used Poly-Fill brand stuffing, but feel free to use what you prefer.

– I don’t use Stitch markers, but if you do you will want those to keep track of your rounds. As a “free” stitch marker you can loop a bright colored piece of scrap yarn through your stitch to act as a marker – then just pull it out when you get back around to it and move it up one row. Easy marker!

This is a simplified pattern – a chart with the numbers – you need to have knowledge of crochet amigurumi and how to do rounds and increases to read. If you do it will be pretty straight forward. All of my Etsy PDF files come with a cheat sheet that helps read my increases/decreases
I start my work with a chain 2 and then sc in second chain from hook, but you can also start with a magic ring if you prefer that start.
This pattern starts with nose/head and then the body is worked. I will make notes along the way to assist with this.
This pattern begins at the front of the nose and then continues to back of the head. FO is on back of the head. After that I like to do the ears, horn, curls etc and sew them on and place the head in my work area to watch me as I finish the rest – but, warning, your smile may get stuck because you won’t be able to stop smiling =)
Starting with your nose/head color and G hook:
| Row/Round | Stitch Count/Number |
| 1 | 6 |
| 2 | 12 |
| 3 | 18 |
| 4 | 24 |
| 5 | 30 |
| 6 | 36 |
| 7-12 | 36 *do your embroidery for the mouth/nose how you want that before getting too far ahead so you can tie off ends inside. My mouth is between rounds 4-5.
Also make your nostrils and sew them on. My are a simple circle of sc 6 in a ring and then for the next round make 2sc in each stitch around for 12sc. Then I slip stitches around in each stitch and ended with a long tail for sewing. The nostrils are between rounds 5-9 |
| 13 | 30 |
| 14 | 24 |
Head
| Row/Round | Stitch Count/Number |
| 15-18 | 24 |
| 19 | 30 – I placed eyes between rounds 19-20 with about 7-8 stitches between them. Place eyes, do eyelashes if you want before placing your backs on the eyes and then once the lashes are like you want and securely tied place your safety backs. |
| 20 | 36 |
| 21 | 36 |
| 22 | 42 |
| 23-25 | 42 |
| 26 | 36 *Stuff as you go and stuff well and continue to stuff. |
| 27 | 30 |
| 28 | 24 |
| 29 | 18 |
| 30 | 12 – place more stuffing inside if needed to be full. |
| 31 | 12 *sew closed. Hide end inside |
Horn: the horn is worked in the rounds and increases a little different so I will note that here:
Start like the rest – chain 2 and sc in second chain from hook and then make 4 more sc for a total of 5 sc.
Round 2: 2sc, sc 4 (6)
Round 3: 2sc, sc 5 (7)
Round 4: 2sc, sc 6 (8)
Rounds 5-6: 8 sc around (1 in each stitch)
Round 7: 2sc, sc, sc, sc, 2sc, sc, sc, sc (10)
Rounds 8-10: sc around (1 in each stitch)
Round 11: 2sc, sc, sc, sc, sc, 2sc, sc, sc, sc, sc (12)
Rounds 12-16: sc around (1 in each stitch) *you can shorten your horn here if you want by doing less rounds
FO and leave a long tail to sew.
Stuff lightly. Pin in place and make sure it is right where you want it before sewing.

Ears(make 2): *I used my H hook for the ears
| Row/Round | Stitch Count/Number |
| 1 | 5 *I just do my one increase at the beginning of the round. |
| 2 | 6 |
| 3 | 7 |
| 4 | 8 |
| 5 | 9 |
| 6 | 10 |
| 7 | 11 |
| 8 | 12 |
| 9 | 13 |
| 10 | 14 *FO leaving long tail. Gather in half at the bottom and fold up to sew |
I stopped now and did all my curls and sewed them on to finish the head – you may prefer to finish the body and then sew the head onto it and then do your curls – that part is completely up to you.
I used my I hook and my Easter Basket yarn for all the curls.
My smaller front curls are a chain of 20 and then 2 hdc in each chain back up. I left a long tail and the beginning and end of my curls to tie onto the head.
I made 3 medium curls for the center back of head. They are a chain of 30 and then 2dc in each chain back up.
One the back of the head I have 3 fatter curls and the same for the tail made from a chain of 30 and then 3dc in each chain back up.
If you want to place your curls exactly where I have this is how many I made and where I put them:
Make 18 smaller curls. Three curls go behind each eye in front of the ears starting next to the horn. Then two go behind those 3 between the horn and the ear. So, that is 5 on each side for 10 so far.
Two more small curls go just behind the horn. The last 6 go behind the ears – 3 on each side. Evenly space your curls so they can have room to curl and move.
Three medium curls go on the back of the head a few rows under the 2 small curls behind the horn. I have mine evenly space between the ears and behind the curls next to the horn.
The three fat curls go a few rows under the 3 medium ones.
Now, I mentioned earlier to leave a long tail before and after each curl. What I do is use my embroider needle to sew and tie on each curl – I sew and tie twice for each one for security – then I pull my tails through the head – I pull the tails from 3-4 curls back through to roughly the same space and then braid the tails to make more “hair” – you can also choose not to do this and just hide your tails inside the head/body.

Body: I used the same color from the back of my head for the body. I feel that you need to probably use the same color from back of head as you do the body to make your sewing blend in and be invisible. You do not want to do all this work and then have visible sewing stitches. The body starts from the bottom up and we leave an opening at top for the neck. You want to pin your head in place and make sure to stuff the neck VERY well before final stitches to support the head.
| Row/Round | Stitch Count/Number |
| 1 | 6 |
| 2 | 12 |
| 3 | 18 |
| 4 | 24 |
| 5 | 30 |
| 6 | 36 |
| 7 | 42 |
| 8 | 48 |
| 9-18 | 48 * I placed my curly tail between rounds 9-10 of the body. |
| 19 | 42 |
| 20 | 42 |
| 21 | 36 |
| 22 | 36 |
| 23 | 30 |
| 24 | 30 |
| 25 | 24 |
| 26 | 24 |
| 27 | 18 |
| 28 | 18 *leave super long tail to sew on the head.. |
Feet/Legs (make 4): *I have used my H hook for these to make it easier, but I was only lightly stuffing them. If you go up to this hook size for ease just be aware of overstuffing. I also crochet tight so going up to an H hook may not be an option for you. You never want to have gaps or holes in your work.
I chose to make long skinny legs/arms, but you can also stop when you get to your round 10 below when you get to 12 sc around and stop decreasing both to make fatter, bigger legs and maybe do less rows if you choose. If you are new to amigurumi you may find that the narrow 6 sc around is too tight for you to easily work up- it is not a problem. Just stop your decreases at 12 sc around and work straight up for your desired number of rows.
| Row/Round | Stitch Count/Number |
| 1 | 6 |
| 2 | 12 |
| 3 | 18 |
| 4 | 24 |
| 5-8 | 24 |
| 9 | 18 |
| 10 | 12 |
| 11 | 6 – change color to your leg color |
| 12-26 | 6 *FO leave long tail to sew. I placed the legs between rounds 6-8 on bottom of body. |
I added a pink star to the front of Unity. It is a very simple pattern:
With pink and a size G hook do your start like we have above and place 5 sc in your start. Then for round 2 make 2 sc in each stitch around for 10sc. Round 3 gets (1sc, 2sc) around for 15 sc. That is your center circle. After you get done with your round 3 and have 15 sc slip stitch in the next stitch and then chain 5. Working back down the chain make a sc in the 2nd stitch from the chain and also in the next chain. Then make a hdc in the 3rd chain and finally a dc in the last chain of your chain 5. Now, skip the next stitch on your center circle and slip stitch in the next. Slip stitch in the next stitch and do another star point like above. *Each star point (5 in all) get 3 stitches on your center circle. So, *slip stitch, chain 5, work the stitches above, skip the next stitch, slip stitch in the next and start over. **
Finally, at the very end I chose to wind some pink around the horn and hide it inside the head – so, thread your needle and yarn and go from the back of the head under a curl up through the horn and evenly wind some yarn around and back inside to secure.

Thank you for taking the time to support my blog. I appreciate you all for your support and would love to see your creations over @theburgundybasket on IG.
Now, as a big Amazon-er, I am going to share some of my favorite things and gifts. I just ordered this luggage as a gift for our Dirty Santa that we play each Christmas and it is super! I just got it today and love it! These other items are a few of the things that I split up and put in my girls’ Christmas stockings last Christmas. I have 3 girls – age 19, 20, and 22. These towels are their favorites as avid beach go-ers:


Discover more from The Burgundy Basket
Subscribe to get the latest posts sent to your email.
2 thoughts on “Crochet Unicorn: Unity the Unicorn!”