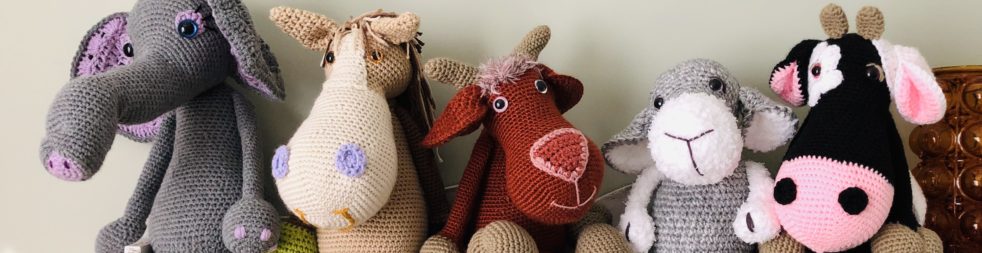
If you are a crocheter and have a baby or toddler, play room or nursery, and love organization and helping your child learn – this post is for you! I am posting new patterns for each letter many times per week so keep checking back.


Want a fun way to use your scraps? Want to make a lot of little projects/toys that are great for little ones? Want to custom a special piece for a wee one? – and then end with one big finale? This project is for you! (And you can skip the big finale if it’s not for you and still have all the little toys and ABCs.)
I have compiled the first letters of this event in a convenient downloadable PDF if you prefer to print them out and have them all in one place. And my printable paid patterns contain a lot more photo tutorials to help you if you need.
You can find the toys for the letters A-F HERE ON MY ETSY.
And now, in Part 2, you can find the letters G-M also on my Etsy at this link right HERE
And MOST ALL of my PAID patterns contain way more photos and tutorials than what I can add to my blog post. I try to keep my fees very low.
Update: I neglected to post the link when I sent group 3 over to my Etsy shop as a downloadable bundle. You can find Part 3 with the letters N-S as a convenient bundle to print out ALL the toys from that set. That 41-page PDF contains the following patterns:
Nest, Ninja, Octopus, Panda, , Penguin, Pig, Queen, Rainbow, Robot *you get ALL 3 Robot’s in this PDF and not just the two on my blog, Snake or Snail, , Sun, and two more PDFs: O is for Otter and Owl and you get MY INCREASE AND DECREASE CHEAT SHEET! Part 3 has a LOT!
This project was in my head as I was designing all of these letters and I’m so excited to get this started! Won’t you join me? Here is the latest new pattern to go with the others already linked. If you prefer to shop on Ravelry for your patterns I also have the entire alphabet PDF over there. 
You can begin by deciding what colors you want to use for your letters – I’ll be using them all! – and make up the alphabet or save this post and wait for the end and make it all at once.
I’m gonna give you some options at the end to make the final part right for you/your space. Here are some of the previous toys so make sure to check out THE ORIGINAL POST to link hop to them all.
Here are some of the latest patterns that are all free here on my blog. I will be keeping THIS ORIGINAL POST updated with all the links for all of the toys.

I will be using some of the patterns that I’ve already made for this ABC project and you will see those linked below at the end of this post. You can go ahead and get started today! I can’t wait to share this with you. I’m planning on at least a weekly update, but I’m going to shoot for two per week. I’m gonna try.
So, join me. Save this post. Let’s get started!

UPDATE: V is for Vampire Bat: July 23, 2020
I want to say thank you for all who stop by to support my patterns and my blog.
I have a new way for you to support my FREE PATTERNS!! I know many or most of you love supporting us makers – the truth is that is takes a long time to create a pattern and then write it and then edit it and get it proofed and tested – and then publish it – then you have to link it everywhere – it’s a lot of work, but us makers do what we do to share our love with you. And, if you have followed my blog, you may know that I do not run ads on my blog, so all my support comes from PDF purchases. Some of you don’t need to purchase the PDF of my patterns but still want to say a quick Thank you – so, you can now support my blog and my work.
This pattern is intended for personal use only. This pattern -and all my patterns- are offered for free or a small fee to help support my family so please do not redistribute, sell, copy or use them in any way not in accordance with fairness.
You may sell products made from this pattern, but please give me credit as the designer. Please do not use my photos as your own work, but you may use my photos to reference back to my blog, Etsy, Pinterest, IG or FB, but please link back to me.
If you find any problems with this pattern please let me know and if you have any problems with any of it feel free to message me and ask for support.
Kristi Bergin-Smith and The Burgundy Basket, 2020. Unauthorized use and/or duplication of this material without express and written permission from this site’s author and/or owner is strictly prohibited. Excerpts and links may be used, provided that full and clear credit is given to me, Kristi Bergin-Smith and The Burgundy Basket with appropriate and specific direction to the original content.
I’ve made this a quick Crochet Bat pattern a quick PDF that you can purchase from my Etsy or Ravelry.
Etsy is HERE and Ravelry
Materials:
Yarn: any 4-ply worsted weight yarn like Caron or Red Heart. You won’t need a lot of yarn for this project. For my brown bat, I used a ball that had 165m/50g (this is 180yds) and I have plenty of that leftover.
UPDATE 2022:

I made these 3 above with one skein of Loops & Threads Impeccable in Black Noir (227 yds/4.5oz/253m/127.5g)
This would be super fun to do in Halloween colors as well like purple.
Update 9/2026:

Bat or Vampire Bat:
Materials: Hook: Size G/4mm hook
Yarn: any 4-ply worsted weight yarn like Caron or Red Heart. I have used Caron One Pound in Black and a ball of brown that is marked 165m/50g (this is 180yds) and I have plenty of that leftover so you will only need a small amount of yarn.
-Safety Eyes or buttons (or yarn to embroider if you choose) and needle to embroider face.
-Stuffing. I have used Poly-Fill brand stuffing, but feel free to use what you prefer.
This pattern starts at the top of the head and works down.
Ch 2 (you can also use a magic ring if that is your preferred method of starting a circle or amigurumi)
Round 1: 6 sc in second chain from hook (6)
Round 2: 2 sc in each stitch around (12)
Round 3: (sc, 2 sc) repeat around (18)
Round 4: ( sc 2, 2 sc) repeat around (24)
Round 5: (sc 3, 2 sc) repeat around (30)
Rounds 6-20: sc in each stitch around (30)(30)(30)(30)(30)(30)(30)(30)(30)(30) (30)(30)(30)(30)(30)
Stop and pop in the safety eyes if you are using them. They go between rounds 8-9 with about 5 holes between them. Start stuffing and stuff as you go.
Round 21: (sc 3, inv dec) repeat around (24)
Rounds 22-23: sc in each stitch around (24)(24)
Round 24: (sc 2, inv dec) repeat around (18)
Rounds 25-26: sc in each stitch around (18)(18)
Round 27: (sc, inv dec) repeat around (12)
Rounds 28-29: 1 sc in each stitch around (12)(12)
Round 30: (sc 2, inv dec) repeat around (9)
Round 31: inv dec, sc around (8)
Round 32: inv dec, sc around (7) – finish with a tail to sew shut
Add nose: it is just a simple circle of 6sc in your chain 2 (like you start the body) – leave a tail to sew between the eyes. Embroider the nostrils before you sew.
The mouth is just a strand of red. Embroider under nose. **you can also do some white teeth, but I didn’t want to add those to this example.
Ears: The ears are worked in rows. You will chain 1 and turn after each row. Leave a tail of several inches before you start and you will use this tail later to tie off and complete.
Chain 2. 6 sc in the 2nd chain from the hook. Chain 1 and turn now and throughout.
Row 2: (sc, 2sc)* repeat (9)
Row 3: (sc 2, 2sc) repeat (12)
Row 4: (sc 3, 2sc) repeat (15)
Row 5: sc 5, hdc, dc, (dc, picot, dc), dc, hdc, sc 5 – leave a tail to sew the bottom closed. If you pinch the bottom closed and sew the edge together using the last tail, you can then tie it to the first tail from the start of your project. Then use the tail to sew to the head and tie again and weave in the ends. Sew just behind the eye on the front of the face.


The wings are constructed in one piece similar to how you did the ears, but this piece is a lot larger. You will work in rows and chain 1 and turn after each round.
*do what is in parenthesis the number of times it says after – so, (sc, 2sc) 2 means do what is in the () twice. And, remember, sc 2 means do a single crochet in the next 2 stitches, but 2sc means do 2 single crochet in the same next stitch.
Leave a long tail for sewing after you are finished.
Chain 2 and make 5 sc in the 2nd chain from the hook. Chain 1 and turn now and throughout.
Row 2: (sc, 2sc) 2, sc (7)
Row 3: (sc 2, 2sc) 2, sc (9)
Row 4: (sc 3, 2sc) 2, sc (11)
Row 5: (sc 4, 2sc) 2, sc (13)
Row 6: (sc 5, 2sc) 2, sc (15)
Row 7: (sc 4, 2sc)* across (18)
Row 8: (sc 2, 2sc)* across (24)
Row 9: (sc 3, 2sc) * across (30)
Row 10: (sc 4, 2sc) * across (36)
Row 11: (sc 5, 2sc) * across (42)
Row 12: (sc 6, 2sc) * across (48)
Row 13: (sc, hdc, dc 4, hdc, sc) 6
Row 14: (sc, hdc, dc 4, hdc, sc) 6
In this next row the Picot stitch goes into the top of the Treble crochet. A picot is just a chain 3 where you slip stitch into the base of the chain 3 or the stitch where you started the chain 3.
Row 15: (sc, hdc, dc, tr, picot, tr, dc, hdc, sc) 6 – finish off and weave in the end or use it to help sew the wings onto the body.
I thread a needle onto the tail from the wing and weave it into the part of the wing that gets sewed under the first ear and then across the top of the wings and use the tail from the start to sew down the middle of the back and then bring my tails together to tie and hide inside the body.
STEAM BLOCK – this really will help those points at the bottom of your work open. If you have never done this before look up how to steam block crochet. It really does change the piece. As you steam, use your fingers to open up the little picot points.
To sew, wrap the upper center piece around the back of the body. The pictures below should help. The little curves wrap just under where the ears are on the back. Pin in place if needed and sew just this center portion. You will also want to tack down the center bottom just above the tail end.


And there you go. This would also be a great choice for the Letter B in this series – B is for Bat

Thank you so much for stopping by. I hope you are all enjoying this crazy, fun thing!! Catch up with me over @theburgundybasket on IG. I’d love to see you and your makes there.
Pin this post and come back for all of the A-Z toys! You can find a link to the original post below to start from the beginning!!

I realized after I started this project that I would never be able to update every new post with every new link – once I got down to the end of the alphabet, I would have to update about 20 post with all the links to all the new patters – So, I will be keeping THIS ORIGINAL POST updated with all the new links for all of the new toys. <3
In addition to the alphabet patterns, below you will find a list of toys that will be linked right here starting now. *these are not set in stone and I may decide to switch them as I work if I am inspired in a different direction. So, pin or save this post and come back and follow along with me or subscribe to my blog and get email updates when I make a new post.
Ball – for the ball toys in this project, I refer you to this post to make one – or many – crochet balls using your scrap yarns. The more textures the better. You can also add rattle boxes, squeakers, stress balls as filler and more. UPDATE: B is for Balls
Bunny – I have made a few bunnies in the past and I will be making another version of my Clover the Baby Bunny Pattern
UPDATE: Latte Bunny and B is for Bunny
Dinosaur – here on my blog you will find an entire Dinosaur Family. For this ABC event, I will be making a different version of Scrappy. He’s the perfect size and uses up some assorted scrap yarns. If you want a different option, Baby Pea is also a nice small size and also Pinky the Dezzy Inspired DRAGON is a good choice for D is for Dragon. UPDATE: D is for Dinosaur
Eye – I will be using the eyeball pattern from my Halloween Bag of Balls for this project. This one would be super cute with some crinkle paper inside. *Also, when you visit this post there is a Zombie ball that would make a cute Z word. UPDATE: E is for Eye
Goat – here on my blog you will find Ginger the Goat in my Farm Series. She is a bit large for this project so she will get a few modifications to be a bit smaller. Feel free to make her if you want a larger goat. *Baby KG will be available soon on my blog, but for now she is only in my Etsy and Ravelry.
Lamb– another make from my Farm Series is Lonny the Lamb. Lonny is a nice, small size so I will be using this pattern here for the Lamb, but will switch up the colors I’m sure. Maybe bright? Maybe a girl?
Octopus – in my opinion this octopus squeeze ball is the perfect baby toy when made from cotton so this is the pattern that I will be using right here. I like to use 100% cotton and the stress/squeeze balls on the inside of the head and it makes these the perfect baby toy with teether capabilities. And they are so quick to make you can make a handful.
Will you be joining in the fun? I’d love for you to make all of this with me, but if not pick a few and make it with me.
I’d love to see all your work or catch up with your progress so connect with me over on IG @theburgundybasket
#youandmeabccrochet
XOXO,
Kristi

Discover more from The Burgundy Basket
Subscribe to get the latest posts sent to your email.

5 thoughts on “You, Me and the ABCs : Crochet ABC Toys: V is for Vampire Bat”